How to Build a Bubbler Hydroponics System
by Kevin
Ever wanted to build a hydroponics system but were too scared of starting because it was expensive or complicated? Well the Bubbler is neither of those and it's the perfect choice for your first homemade hydroponics system.
The Bubbler system is known amongst hydroponic gardening circles as one of the cheapest, easiest to build and functional systems around town.
If you're after your first DIY hydroponics system, then the Bubbler is perfect, because you don't risk wasting a lot of money on something that won't work right, you get to experiment with a wide variety of plants that can be successfully grown in a Bubbler system and you don't even need any extensive knowledge on hydroponics to make it work.
So let's take a look at how to build a Bubbler hydroponic system from scratch.
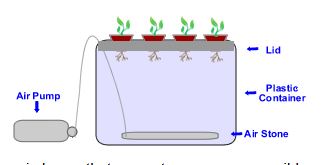
How it Works
The Bubbler Hydroponics System - How it Works
At its roots, the Bubbler is a water culture system, meaning that your plants will be sitting directly on a pool of well oxygenated water, mixed with nutrient solutions. This basic principle stands, but what the Bubbler does different from other water culture homemade hydroponic systems is this: you don't need Styrofoam or any similar floating material to keep the plants hovering the solution and you don't need any containers that are specifically aimed for use in hydroponics; you will be using everyday materials, such as plastic cups, a plastic bucket and a lid.
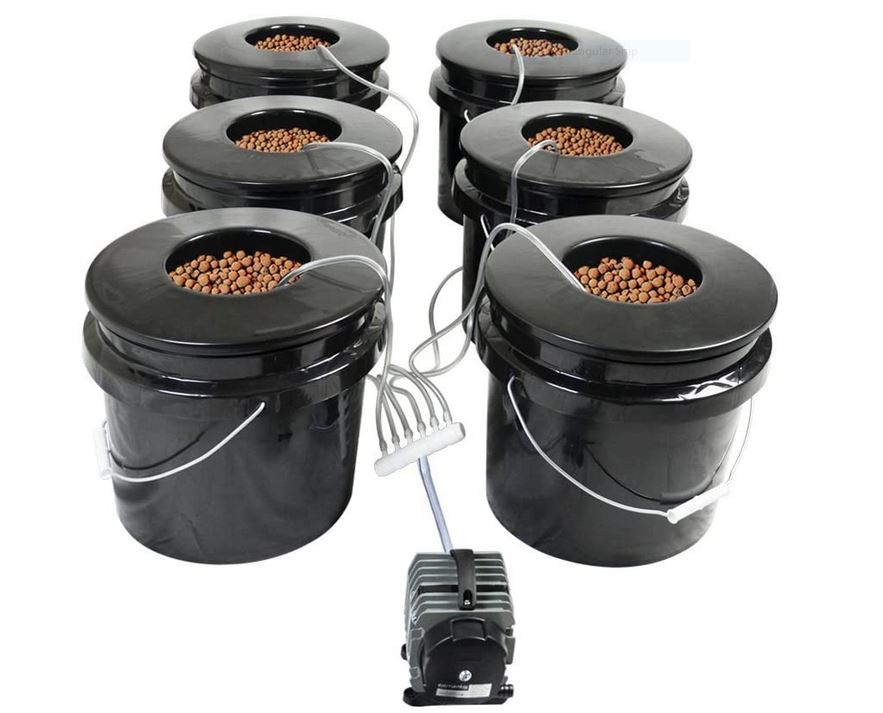
Components
The Bubbler Hydroponics System - Components
You can purchase some of the components from your local store (Home Depot, Walmart, etc) or order them online from a recommended hydroponics store.
- 1 plastic container - this can be a simple plastic bucket, a mayo tub, a paint bucket and so forth. Just make sure it's strong enough to hold the nutrient solution for a long time and that the lid fits.
1 lid - hopefully, you found a container that has its own lid, so you won't have to go searching for something that fits. In any case, the lid needs to be plastic, because you'll be needing to drill some larger holes in it. - 4-5 plastic cups - the number of cups you will use depends on the size of your lid and container. In a 5 liter container, 4-5 cups are usually the most you could fit in.
- 1 air pump - just your average aquarium aerator pump, nothing fancy
- 1 air stone - same as above
- Air tubes - used to connect the air pump to the air stone, they can be found in your local pet shop and it's best if you buy them at the same time as the air stone and air pump, so you can make sure they fit before rushing home to build a hydroponics system
- Growth media - rockwool, perlite, clay balls, anything goes, as long as your plant won't mind
How to Build
The Bubbler Hydroponics System - How to Build It
If you find the process of building your own system too difficult, c onsider buying one of our recommended hydroponic systems.
The first thing you need to do is get the dimension of the bottom of the plastic cups and draw a few circles of matching size onto the plastic lid of your container. Try to draw the circles so that you get as many as possible, but at the same time, you'll need to leave a few inches between each. Hopefully, at least 4 circles will fit on the lid.
If the plastic is light enough, you can use a cutter to carve out the holes around the circles you just drew, otherwise you could try with some power tools. That will be the suspended plant platform of your cheap hydroponics system.
Make sure the plastic cups fit in the holes, but that they remain suspended at the top (as in, make sure they don't fall in the container through the lid). Once that's over with, you'll need to cut holes in the sides and bottom of each plastic cup, in order to allow water to flow freely through them.
Place the airstone and air pump inside the container and fill it up with nutrient solution and water. Make sure the water level is close to the lid, so that the plants and cups will be suspended in actual water, not in mid air.
Now, place the lid and insert the cups in the lid holes. Put your plants in the cups carefully and fill the empty space with grow media. There you have it, you managed to build a hydroponics system from scratch!
Building Difficulty
The Bubbler Hydroponics System - Building Difficulty
As far as homemade hydroponic systems go, the Bubbler is most likely one of the easiest to build, not only because it's not very complicated in its structure, but also because you can easily use household components to get it done.
If you're planning on building a hydroponics system for the first time, the Bubbler is your best choice for getting some experience.

About Kevin
Thoughts on "How to Build a Bubbler Hydroponics System"
 |
 |
 |
 |
Hydroponics Tips